Storme overview
Storme allows you to brainstorm or whiteboard in a variety of ways by dropping media onto a flexible canvas beautifully formatted to allow you to focus on the brainstorming process. Supported media types include images, audio, video, webpages, as well as personal audio, video, photo, and text notes in a number of attractive styles.
Add drawings with a variety of preset line widths and colors using the drawing tool. Or use it to trace over images to create a starting point for additions or modifications for your designs. You can also use the drawing tool as a free-hand tool for making diagrams, charts, or even performing back-of-envelope calculations.
Add web page captures by dragging from your web browser’s address bar or just typing the web address. Great for that bird’s-eye view of different web page designs or for just providing visual inspiration.
Opt for text-only pages to focus on developing your ideas in written form without any visual distractions. Or perhaps add a facing media page to provide targeted inspiration for your written explorations.
Use Storme to easily brainstorm, explore, develop, and present ideas according to your preferred style.
Storme toolbar

The Storme toolbar has five groups of toolbar buttons. The first group of buttons are for working with the notebook itself. These include actions for adding notebook pages  , changing to the table of contents view
  , and changing to the page thumbnails view
  .
.
The second group of buttons is for adding content to media pages. These include actions for adding text notes  , audio notes
  , and video notes
  , as well as adding photo captures
  and web page captures
  .
.
The third group of buttons is for drawing on the canvas  and erasing drawings
  .
.
The fourth group of buttons is a single button  that opens a media browser which you can use to add media to both media pages and text pages (as clickable hyperlinks).
The fifth and final group of buttons is for performing more general tasks such as sharing the current notebook page  and showing a series of tips
  .
.
Adding notebook pages
To add a new notebook page click the Add Page button in the toolbar. From the popover that appears select the kind of page you wish to add. There are two types of pages: media pages and text pages. You can also add left-facing or right-facing pages for a more conventional notebook view.
Adding media
To add media simply drag and drop media into a media or text page. Added media will show up visually in media pages, and textually as clickable links in text pages.
You can also add media by clicking the Add Media… button in the toolbar, which will open the media browser. The Media section in the media browser allows you to view your music, photos, movies and other media as convenient thumbnail previews before adding.
Adding notes and captures
To add a note or capture to a media page, click one of the grouped note or capture buttons in the toolbar. You can add text notes, audio notes, and video notes, as well as photo captures, and web page captures. This group of buttons is enabled only when a media page has key focus.
Adding sketches
To add a sketch, click the drawing tool in the toolbar. You can select the line width and color in the attached drop-down menu. The cursor will change to a crosshair and you can draw anywhere you wish, including overtop media items. Click it again to leave drawing mode.
To erase lines, click the neighboring eraser tool and drag over the line segment you wish to erase. The cursor will change to an eraser. The eraser tool will remove a contiguous unbroken line with one swipe or touch.
Adding lists and tables
To add a list or table to a text page, select Add list… or Add table… from the Format menu while the text page has key focus. A standard list or table editor will appear.
Navigation
To navigate between pages in your notebook, simply swipe left or right. You can jump to specific pages by opening the Table of Contents view and clicking a thumbnail (or double-clicking a thumbnail in the Page Thumbnails view).
To zoom a media page, scroll vertically. To pan a media page, click and drag on an empty area of the media page, or Option-scroll in the direction you wish to pan.
To zoom into the Table of Contents view easily, pinch zoom the main notebook view.
Table of contents
To switch to the table of contents view click the Show Table of Contents button in the toolbar. You can also access the table of contents by pinch zooming the main notebook view.
This view shows a list of horizontal thumbnails for all notebook pages with titles. Double-click any title to edit the title for that thumbnail. Click on any thumbnail to open the notebook to that page, or press Escape to exit the Table of Contents view and return to the last notebook page you were working on.
You can adjust the size of table of contents thumbnails by pinch-zooming. Contextual editing actions are available only for indvidual pages.
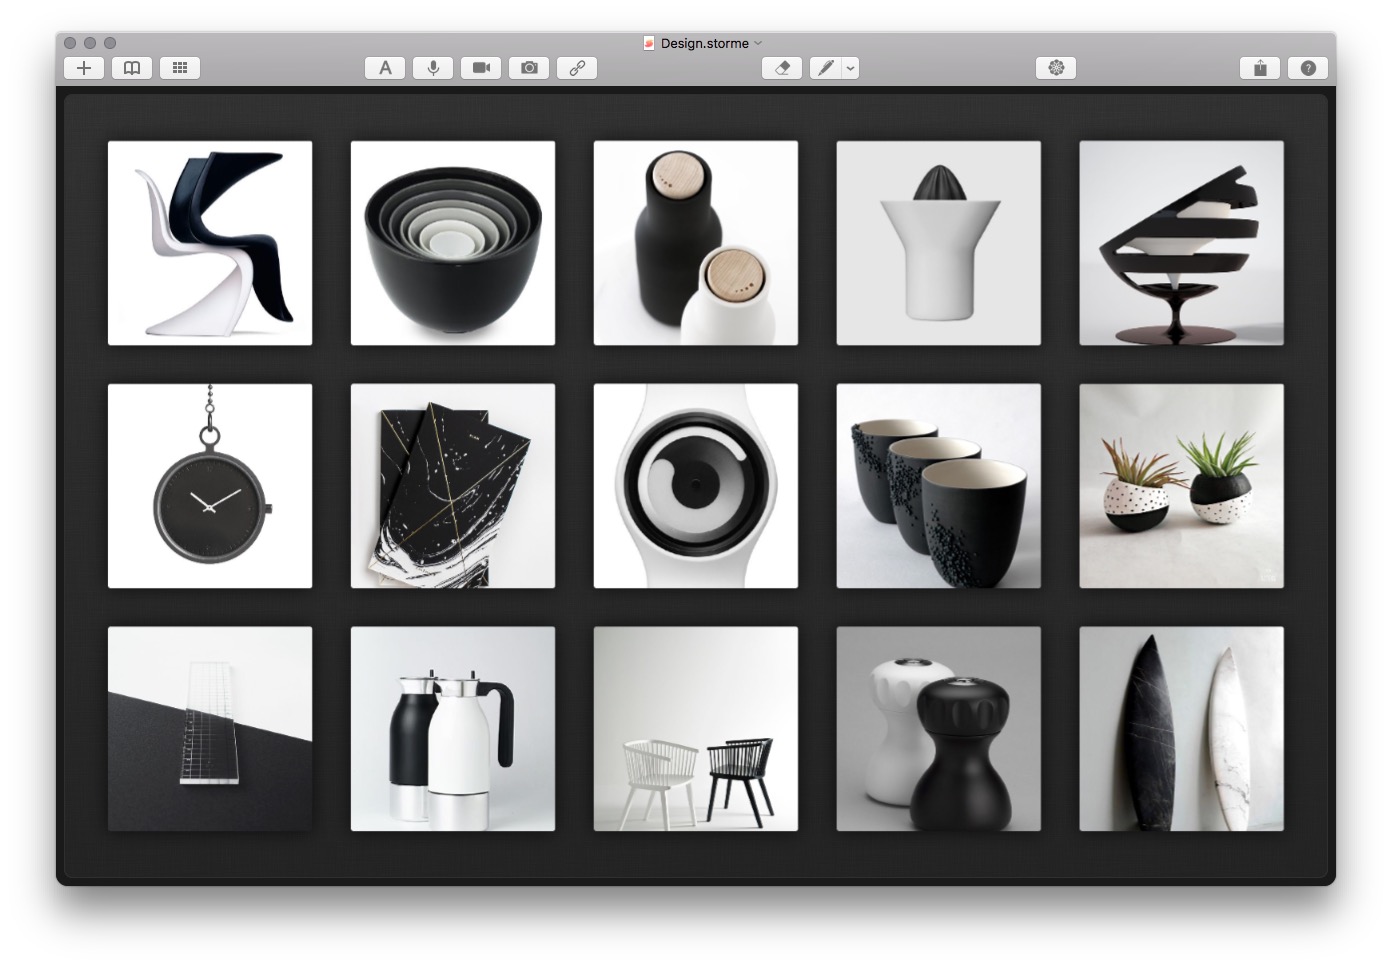
Page thumbnails
To switch to the page thumbnails view click the Show Page Thumbnails button in the toolbar. This view shows a condensed grid view of all pages in the notebook. This is also the place where you can drag-reorder pages, split pages, join pages, cut/copy/paste/delete pages, or share pages.
These functions are available from the context menu of individual page thumbnails. All contextual menu actions apply equally well to selections of pages as well as individual pages.
Context menus
Many options are available for media page items that are contextual and unique to each type of media. Some of these options include:
- resizing
- pinning
- bringing/sending to front/back
- cut/copy
- smart zooming
- sharing
- opening in external apps
- styling
All contextual actions apply equally well to selections of items as well as individual items.
Text pages have additional context menus to change the text page theme (white, light, sepia, gray, dark, black). Alternatively, these themes can be accessed from the Format > Theme menu when the text page has key focus.
Sharing
To share something simply context click the item and select from the Share menu. You can also make a selection and select from the Share menu within the context menu or the main menu.
You can share individual media page items, the current notebook view, a notebook page, as well as selections of pages in the page thumbnails view.
Modifier keys
To modify an action in some way, press a modifier key while performing the action. For media page items, standard modifiers such as Command (⌘), Option (⌥), Shift (⇧), and Control (⌃), including their combinations, can resize items in a variety of ways.
Modifier keys can also change the zooming and panning behavior of the media page including zoom-to-cursor.
Finally, modifier keys can also change the window resizing behaviour to be constrained to the printed page aspect ratio (for full page coverage), the current notebook content aspect ratio, or standard window resizing behavior.
iCloud
iCloud is fully supported, which means any content you add to a notebook on one device will be available on other devices as well, provided the notebook is stored on your iCloud Drive.
If you add large image, audio, or video files to your notebook, Storme will transcode a highly reduced version of the media to your iCloud Drive to allow for fast syncing with your other devices, and also to avoid taking up precious iCloud Drive storage. You can select the amount of iCloud storage transcodes use from the Storme preferences pane.
See also
Notebook terminology
Adding pages to notebooks
Adding media
Adding notes
Table of contents
Page thumbnails
Preferences
Keyboard modifiers
Keyboard shortcuts